
updated: 26 January 2025
Click  Home Home
 How to hook up a 3-way switch How to hook up a 3-way switch
There's usually at least one 3-way switch in a home and at some point it will need replacing. These are the switches that are at either end of a hall or stairway. I'm going to help take the frustration out of the job.
REMEMBER when working with electricity it is important that you turn off the power at the circuit breaker first before starting!
3-way switches have three wires connected to them. Some switches have screws for the connections, others have the wires stabbed into the back of them. Out of the three wires, only one of them is a critical connection wire. That would be the wire that is connected to the "common" connector.
The common connector is indicated by a black screw on the switches that have screws. The switches that have the stab holes in the back have the common connector actually tagged with the word "common" of just "com".
It is very important for your sanity that you indentify which wire is connected to the "common" terminal before removing any of the wires. Always try to disconnect the wires whole rather than cutting them. The wires that are stabbed into the back can be easily removed by sticking a thin small screw driver, (like a jewlers screwdriver) into the tiny "release" hole alongside each inserted wire.
If you had X-ray vision, you could see how the wires are connected, but for people like you and me, here is a diagram that shows how they are connected:
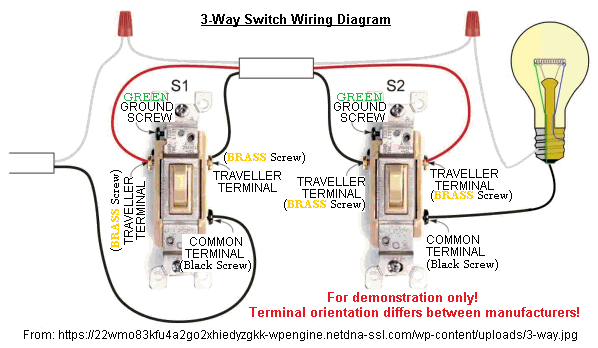
Always mark your wires. If anything, at least mark which wire was connected to the common terminal. The other two wires just talk back and forth between the two switches. They actually can be interchanged.
Only the placement of the Common wire is extremely important. On one side of the circuit, the (HOT) power coming from the circuit breaker is connected to the common terminal of the first switch. The "output" of the 3-way circuit, which comes out of the second switch's common terminal, goes to the center connection of the luminaire (lighting fixture).
One cannot rely on the geographic location of the wires on the switch unless they are exactly the same from the same manufacturer. Since each manufacturer has to make their own patent they do not make the layout universal. The only thing universal is the black screw and the "common" tag of the "common" terminal!
Hope this helps you get your switch sorted out to make a quick and easy replacement!
Coming soon: 'How to Wire a 4-way Switch'
|
 
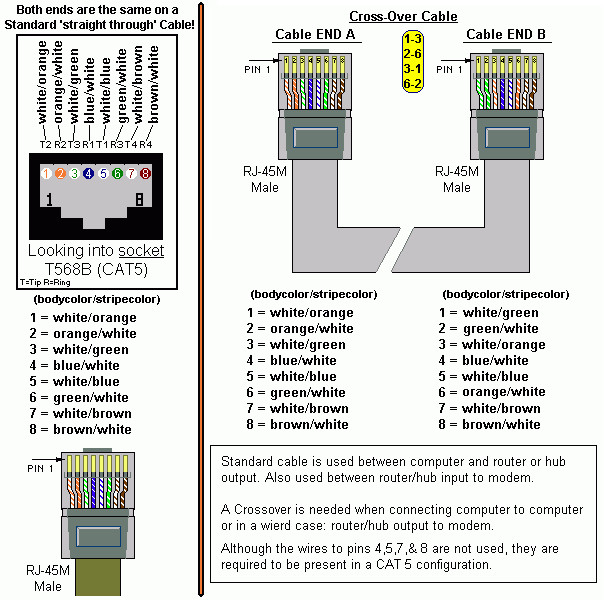
 Wiring order of a CAT-5 connector Wiring order of a CAT-5 connector
Putting together a CAT-5 or 6 cable is pretty straight forward, if you follow this graphic that I had made as a cheat sheet
for myself back in 1999.
What you need to know is the strip back the outer cable cover about an inch, then using a small wire
cutter, (or electrician scissors), trim the ends of all of the wires together so that they are all straight across the same length.
Now here is where some folks go wrong: Never strip back the wires that are actually going to be inserted into the RJ-45 connector. The connector has blades that will cut through the insulation and connect to the wires. If you strip the wire insulation off first, then you are risking a bad conection in that connector. So please don't do it!
If you are interested, I use this tool kit for making up the cables:
Telemaster RJ-45 Kit!
When in a pinch, "Channellocks" work good to crimp the connector down.
Channellocks have the capability to go down straight with even pressure.
Regular pliers do not!
|
 How to Thread PVC Pipe How to Thread PVC Pipe
Anyone who has attempted to thread PVC pipe knows that it appears to be almost impossible, yet they sell threaded PC pipe in the irrigation department in most home improvement stores. So what gives?
The first part of the trick is to thread Schedule 80 or above! The pipe wall of Schedule 40 is too thin to thread! By the time the threads are cut, the pipewall is super thin in the groove of the threads and easily tears open.
The second part of the problem while threading PVC is that it collapses while running the pipe through the die.
I worked with Ray Hill, a man who has unfortuneatly passed away from a fork lift accident. Ray discovered that if one puts something snug into the pipe to support the inside from collapsing, any threading device can be used. Since Ray's discovery, we have consistenly threaded PVC pipe from 1/2-inch to 4-inch!
The equipment that we have used for threading Schedule 80 PVC are:
Unfortuneatly for this article, I have retired and therefore no longer have access to the equipent to make a YouTube video so this page will have to suffice! Ray had turned a bunch of wood plugs on a lathe to use as inner pipe supports for threading the PVC pipe. But I discovered that the inside pipe diameter of an Schedule 80 pipe is similar to the outside pipe diameter of it's next smallest pipe.
As an example, if you want to thread a 1-inch pipe, you take a 3/4 inch steel pipe nipple of a nominal 3-inches long and run the threads of one end over a grinder to knock the sharp cutting edge off the thread ridges. This is to prevent the steel pipe nipple from etching small lines inside the PVC pipe which could cause it to break at that point later on (like cutting glass: scratch and break).
Miscellaneous Thoughts:
- We used "Simple Green" as our lubricant when threading the PVC pipe. Using oil is unnessesary and messy!
- For 1/2-inch PVC pipe I used a deep socket from my tool drawer as the inner support media. You can use just about anything that will slip into the end of the pipe snugly. The media has to allow the pipe die to pass over it. So nothing that has a head on it! Except a socket head shoulder bolt will also work.
- The support media should never be forced into the end of the pipe. Doing so would cause the pipe end to flare and then force the die to cut the pipe threads too deeply.
- Using threaded steel pipe nipples as the media support with the threads dulled works the best since they have a small taper on them which makes them insert easily into the end of the PVC pipe that one is threading. It just has to be snug enough to not fall out, but not tight enough that it is flaring the pipe end.
- The threaded PVC pipe nipples that are sold in the home improvement stores is Schedule 80. If you like, you can buy longer ones at the store and then use them as "stock" to make your own custom lengths.
(1/2" x 36"
3/4" x 24")
Otherwise to find schedule 80 pipe, you must go to an irrigation supply store, like "Ewing" or "Bonnett Irrigation"
Size Chart
Steel Pipe Nipple fits into Sched80 PVC
This is for threading the PVC pipe only! |
Threaded Steel Pipe
Inches | Fits into
 | PVC
Inches |
| 3/4 | | 1 |
| 1 | | 1-1/4 |
| 1-1/4 | | 1-1/2 |
| 1-1/2 | | 2 |
| 2 | | 2-1/2 |
| 2-1/2 | | 3 |
| 3-1/2 | | 4 |
Anything that will fit snugly and clear the cutting die will work! You don't have to buy fittings to do this. I used pipe fittings because at work we had bins full of them. So they were readily available.
|
|